Help Scout
Help Scout is a customer service software that brings all email and chat conversations with a customer to a shared inbox, keeping the whole team on the same page.
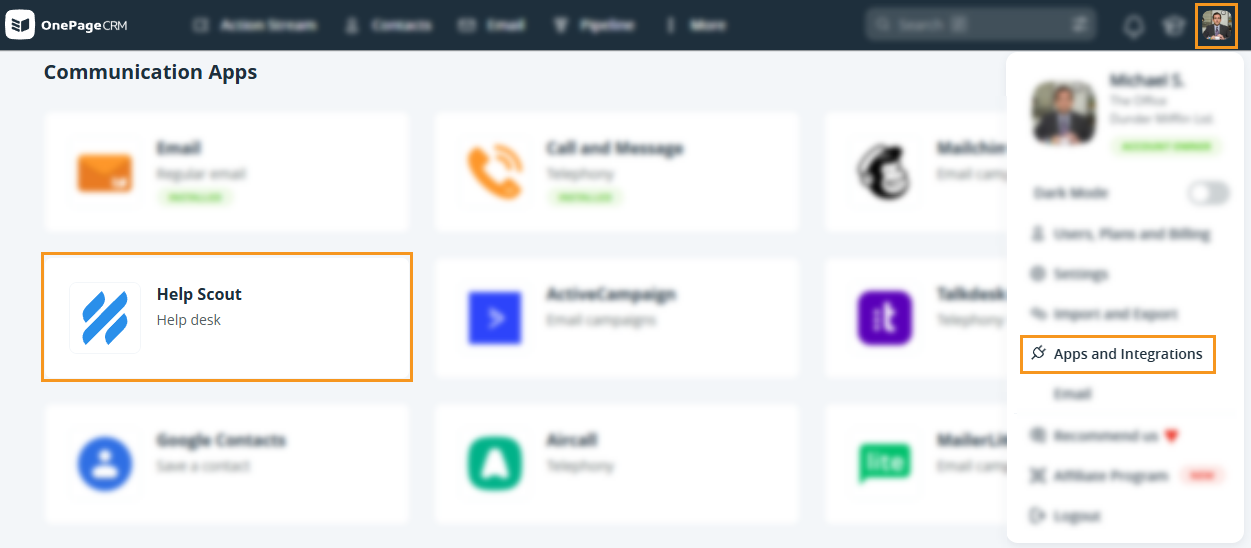
Connect OnePageCRM with Help Scout for an enhanced customer experience by quickly adding new contacts or opening existing contacts in OnePageCRM right from your Help Scout dashboard, along with the option to view contact details and associated deals right inside Help Scout.
- You need a Help Scout account to connect it to OnePageCRM.
- Only Account Owner or Administrators can configure and manage the integration.
In this article:
| Display contact details from OnePageCRM in Help Scout |
| Help Scout Widget |
Display contact details from OnePageCRM in Help Scout
| Connect your Help Scout account |
| Select/Edit contact details to be displayed in Help Scout |
| Create a new contact from Help Scout |
Connect your Help Scout account
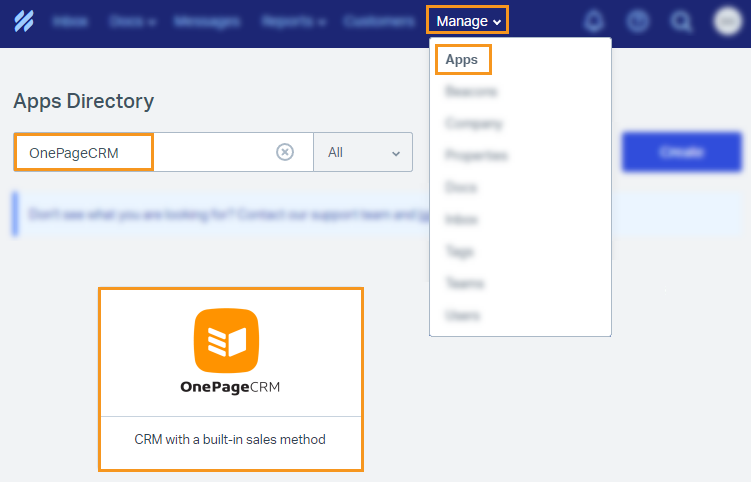
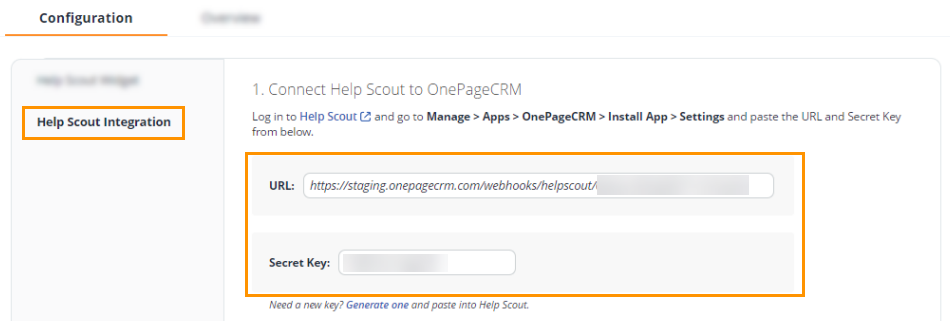
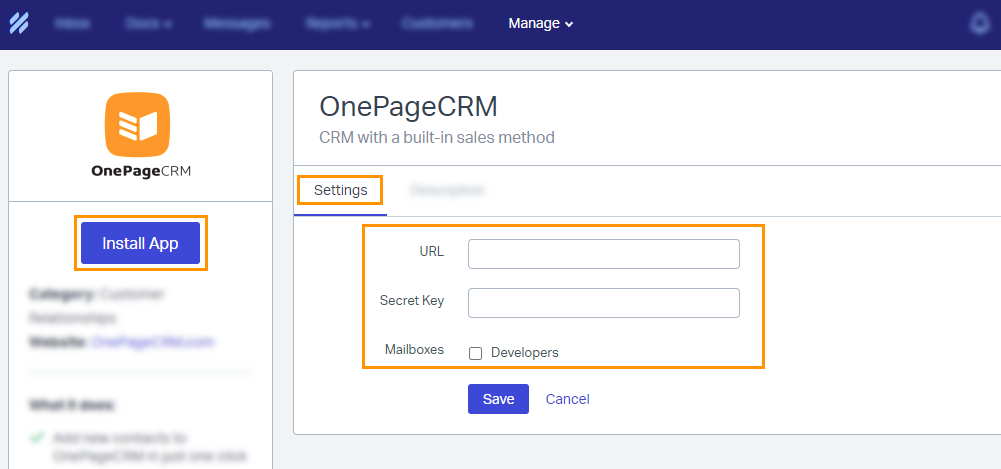
Help Scout will ask for a URL link and Secret Key. You can find both in the browser tab for OnePageCRM on the Help Scout configuration page (see step 3 below).
Select the Help Scout integration tab (left-hand-side menu) → under step 1. Connect Help Scout to OnePageCRM section → copy the URL and Secret Key.
Select/Edit contact details to be displayed in Help Scout
Jump up to Article's Overview ⮝
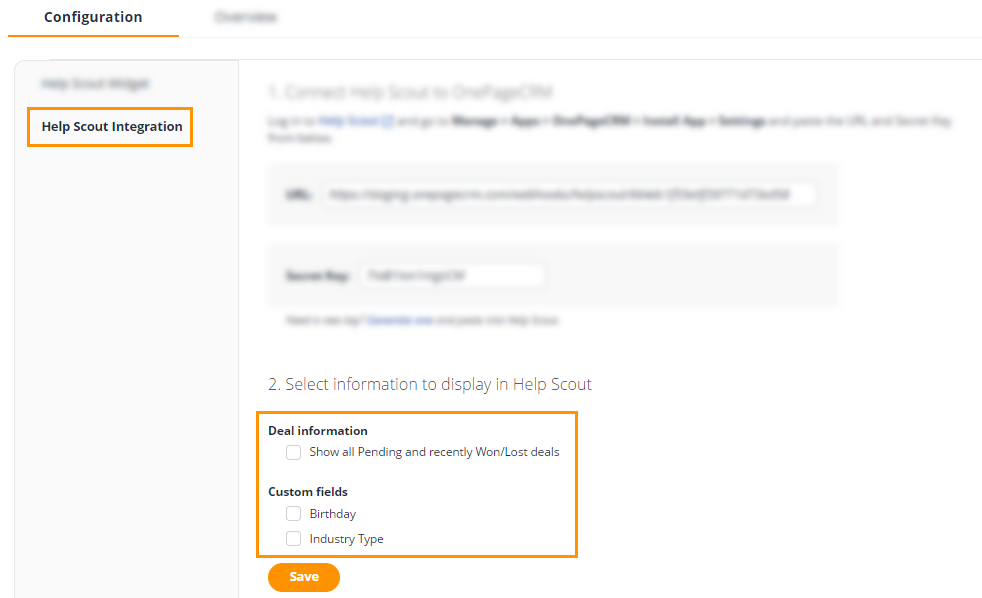
💡 View key OnePageCRM contact details, including Next Actions, Tags, Status, Deals, and Custom Fields.

Create a new contact from Help Scout
Jump up to Article's Overview ⮝You can add new contacts from Help Scout and save them in the CRM once you are connected to the Help Scout integration.
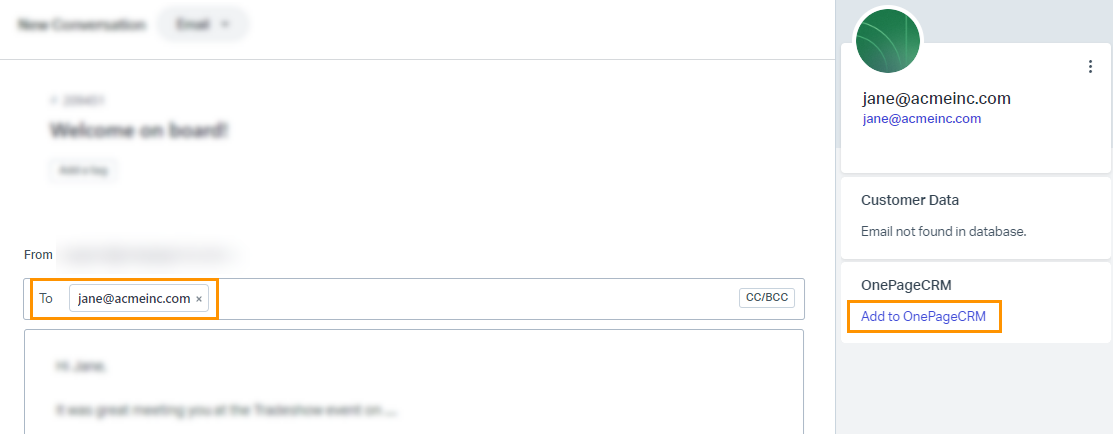
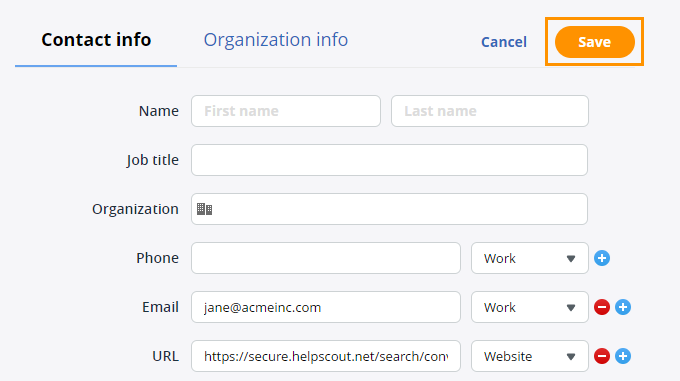
💡 The email address and URL to the Help Scout conversation will be populated automatically.
💡 In case there are other details associated with the email address of the contact, e.g., first name, or last name, they will be populated as well.
Help Scout Widget
With the Help Scout Widget, users can quickly and easily review chats or emails sent/received to their connected Help Scout account for contacts saved in the CRM.
This feature allows users to retrieve valuable information about previous email and chat communication via their Help Scout account, enabling them to stay informed and organized.
Please ensure you are logged in to your Help Scout account or create a new one if you don't have one.
Enable the Help Scout Widget


Find/Use the Help Scout Widget
Jump up to Article's Overview ⮝

💡 The Help Scout widget will display contact-specific data for up to 10 email addresses saved with this contact.
💡 The widget pulls information from all Mailboxes in Help Scout.
💡 The widget and data displayed are visible to all users who can access the contact in the CRM.
💡 If a contact is CC'd in the email, the email/chat will be shown in the Widget. However, if they are BCC'd, the email/chat will not be displayed for them in the Widget.