
How to use Filters
Filter your contacts to quickly and easily search through your database to create uncluttered reports of your contact groups. You can add and select multiple search criteria such as custom fields, address, deals, duplicate contacts, last activity etc. Go one step further and save your Filter for later use in the Pipeline.
| In this article | |
| Add / Save Filter | Edit a saved Filter |
| Clone a saved Filter | Delete a saved Filter |
Add Filter
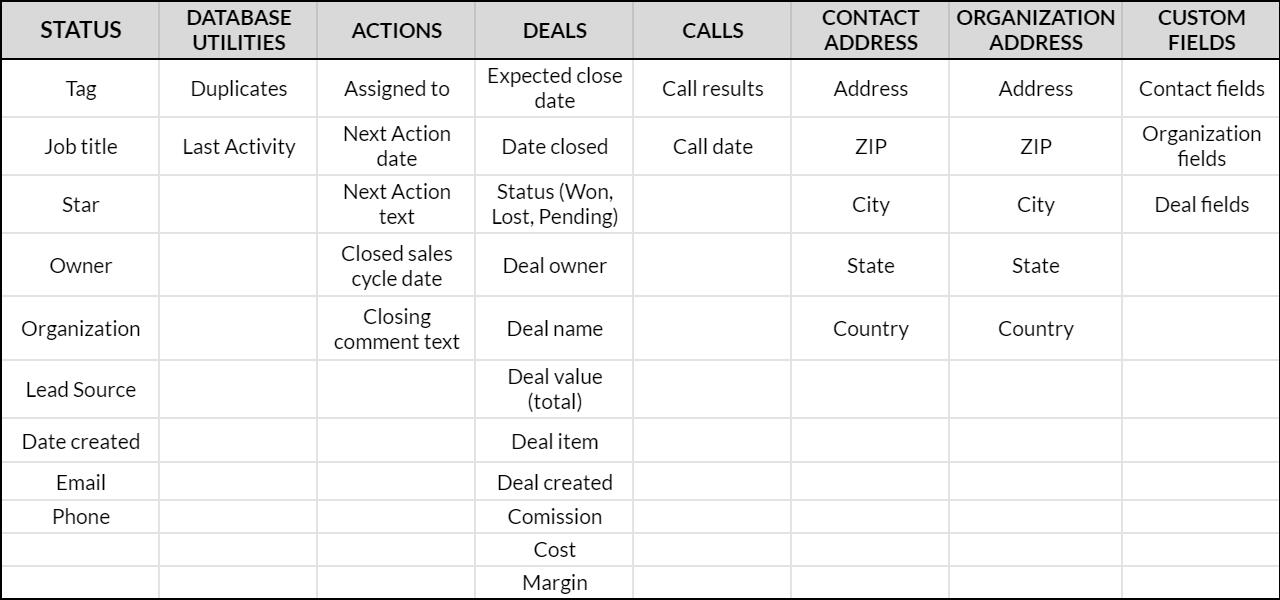
In OnePageCRM you can filter by a combination of multiple criteria:
Note:
If you are on the Business plan and have User Groups, you can filter by User Groups for the Owner criteria.


Note: Enter a descriptive name into the Filter name field to save it for later use.

Edit a saved Filter


Clone a saved Filter


Delete a saved Filter

NOTE
- Live update of available contacts in this filter is shown in the top right corner of the Filter pop-up.
- Saved filters can also be used in the Pipeline. See here.
- When you delete a filter by mistake, you can click on the Undo link in the yellow message on the same screen.